

Introduction
So recently I got myself a new shiny M1 based MacBook Air. To make it clear, although it has 'Air' in its name, this machine is more than capable of handling all types of backend development workloads like coding, compilation, ML tasks, and more, really well. After switching from my 15" MacBook Pro (2018) I can say that pretty much everything seems faster and more responsive, even tools that have not yet been migrated to run on M1 natively and hence require translation via Rosetta2. Added benefits of choosing MacBook Air over MacBook Pro (which at the time of writing is only available with Intel CPU), except of course being super light and transportable, are its innovative fan-less design and its welcome absence of touch bar. So overall, after having used MacBook Air for a few weeks as my primary dev machine, I have to agree with many reviews available on the web in that this is probably the best laptop you can get right now as a Web and/or Backend Developer.
But to make the most out of it, it is absolutely key to set up this new toy for maximum productivity with the right choice of software tools and configuration. In this blog post I would like to share with you some of the tweaks and tools I personally used to transform my new MacBook into a productivity monster with a goal of hopefully making your life a little bit easier when you have to do the same.
Disclaimer: Everything I share in this post are my personal experiences and preferences, so feel free to skip/adjust certain steps, this is just to serve as an example of one of the possible configurations, as always -- YMMV.
System Preferences
Updates
First things first -- make sure that your new machine has all the latest Apple updates installed (General -> Software Update).
Trackpad
- Point & Click tab
- Check 'Tap to click' -- this takes some time getting used to but after that you won't want to go back.
- Adjust tracking speed slightly to the right according to your preference
- Check 'Silent clicking'
- Scroll & Zoom tab: Untick 'Scroll direction: Natural' (does this really feel natural to anyone?)
Keyboard
- Keyboard tab
- Move 'Key repeat' and 'Delay until repeat' riders all the way to the right (this will make you much faster in editing -- and this is what we do as developers all day long!)
- Check 'Use F1, F2, etc. keys as standard function keys'
- Text tab: Uncheck all auto-correction checkboxes (it costs more time to correct the corrections)
- Shortcuts tab: If you have multiple Input Sources configured, it's easier to press the
FNkey to switch between input sources so I would recommend to uncheck both 'Input Sources' shortcuts, which might interfere with IntelliJ shortcuts (which we'll come to in a second)
General
- Appearance: 'Dark' (we all know it's a must have)
- Prefer tabs: 'always'
- Uncheck 'Close windows when quitting an app' (this will be important later for restoring terminal sessions)
Security and Privacy
- General tab: Select 'Require password immediately after sleep or screen saver begins' -- better safe than sorry
Dock & Menu Bar
- Make sure you tick the checkboxes 'Automatically hide and show the Dock' and 'Automatically hide and show the menu bar' to maximize usable screen estate
Tools
Now we come to the juicy part: this is where we install our development tools. Ok, let's go!
Homebrew
Open the Terminal by hitting ⌘ + Space to open Spotlight and type 'Terminal' (btw, don't forget to pin). First of all we need to do some ground work to get started. Type xcode-select --install into your Terminal window and hit Enter. This will install Xcode CLI tools.
Next, we need to install Homebrew - the missing package manager for macOS:
/bin/bash -c "$(curl -fsSL https://raw.githubusercontent.com/Homebrew/install/HEAD/install.sh)"
Now before we move on to the next step it's important to understand that Homebrew supports two types of 'packages': CLI tools which in Homebrew's jargon are called formulae and your regular macOS GUI Applications which are known as casks. I would generally recommend to install all CLI tools and macOS GUI Applications via Homebrew if such a package (formula or cask) is available. This way it will be easier to track which packages are installed and would also make upgrading a breeze.
Run brew doctor to verify that everything is set up correctly. Here are some useful Homebrew commands you'll be using quite often:
brew update # update all installed taps (taps are repositories containing formulae or casks, 2 core repos homebrew/core and homebrew/cask are pre-installed, others, such as adoptopenjdk/openjdk can be added separately)
brew upgrade # upgrade outdated versions of formulae and casks
brew install <formula_name> # install specified formula (CLI tool)
brew install --cask <cask_name> # install specified cask (GUI Application)
brew search <formula_or_cask> # search online for available formulae and casks matching the specified substring, can also be applied to searching only formulae (add --formula) or to casks (add --cask)
iTerm2
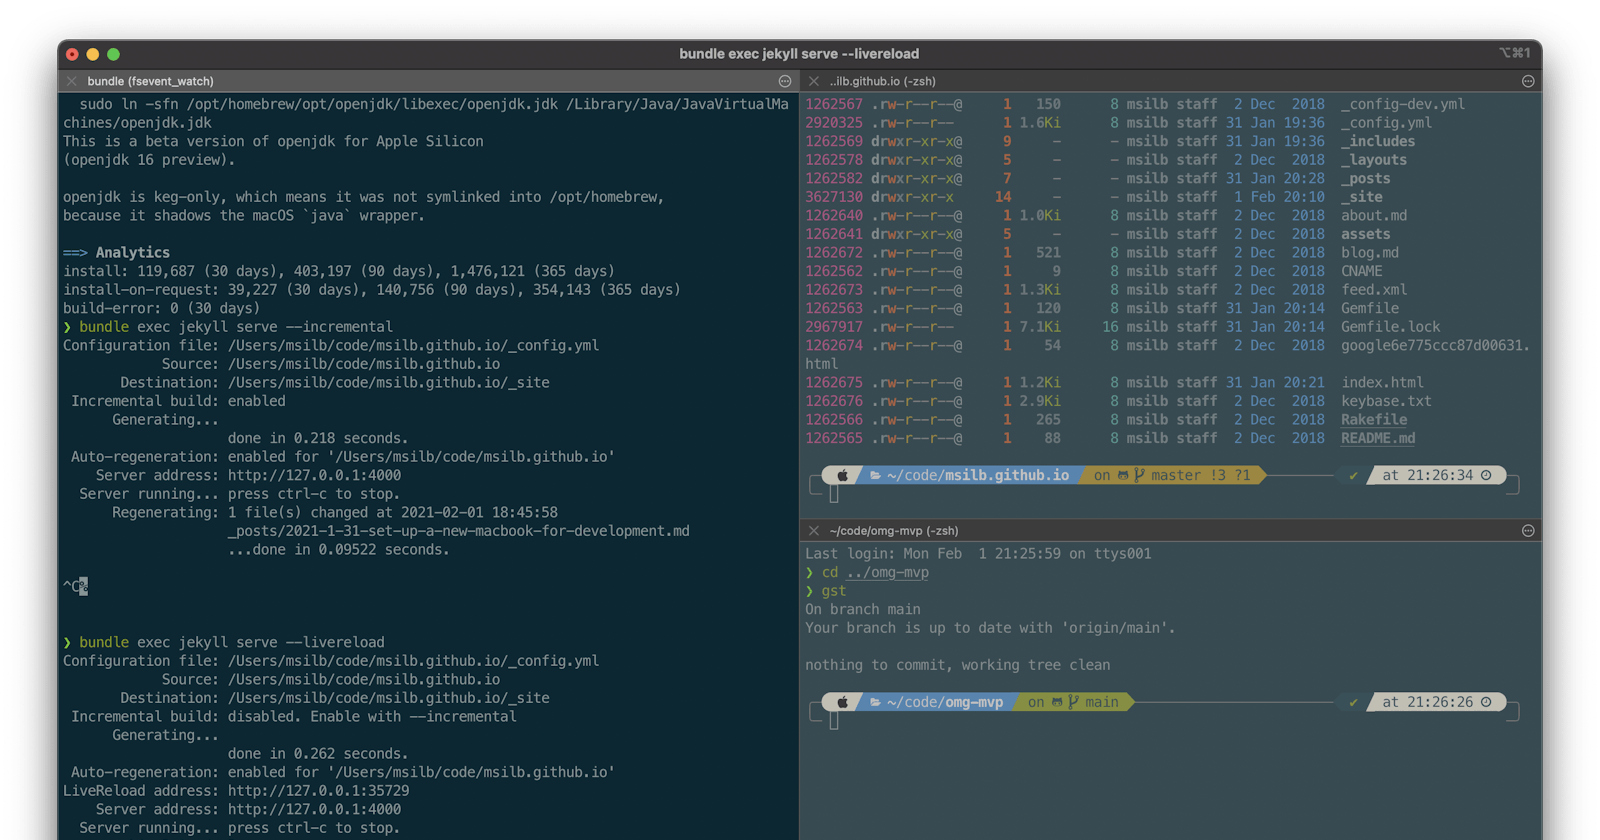
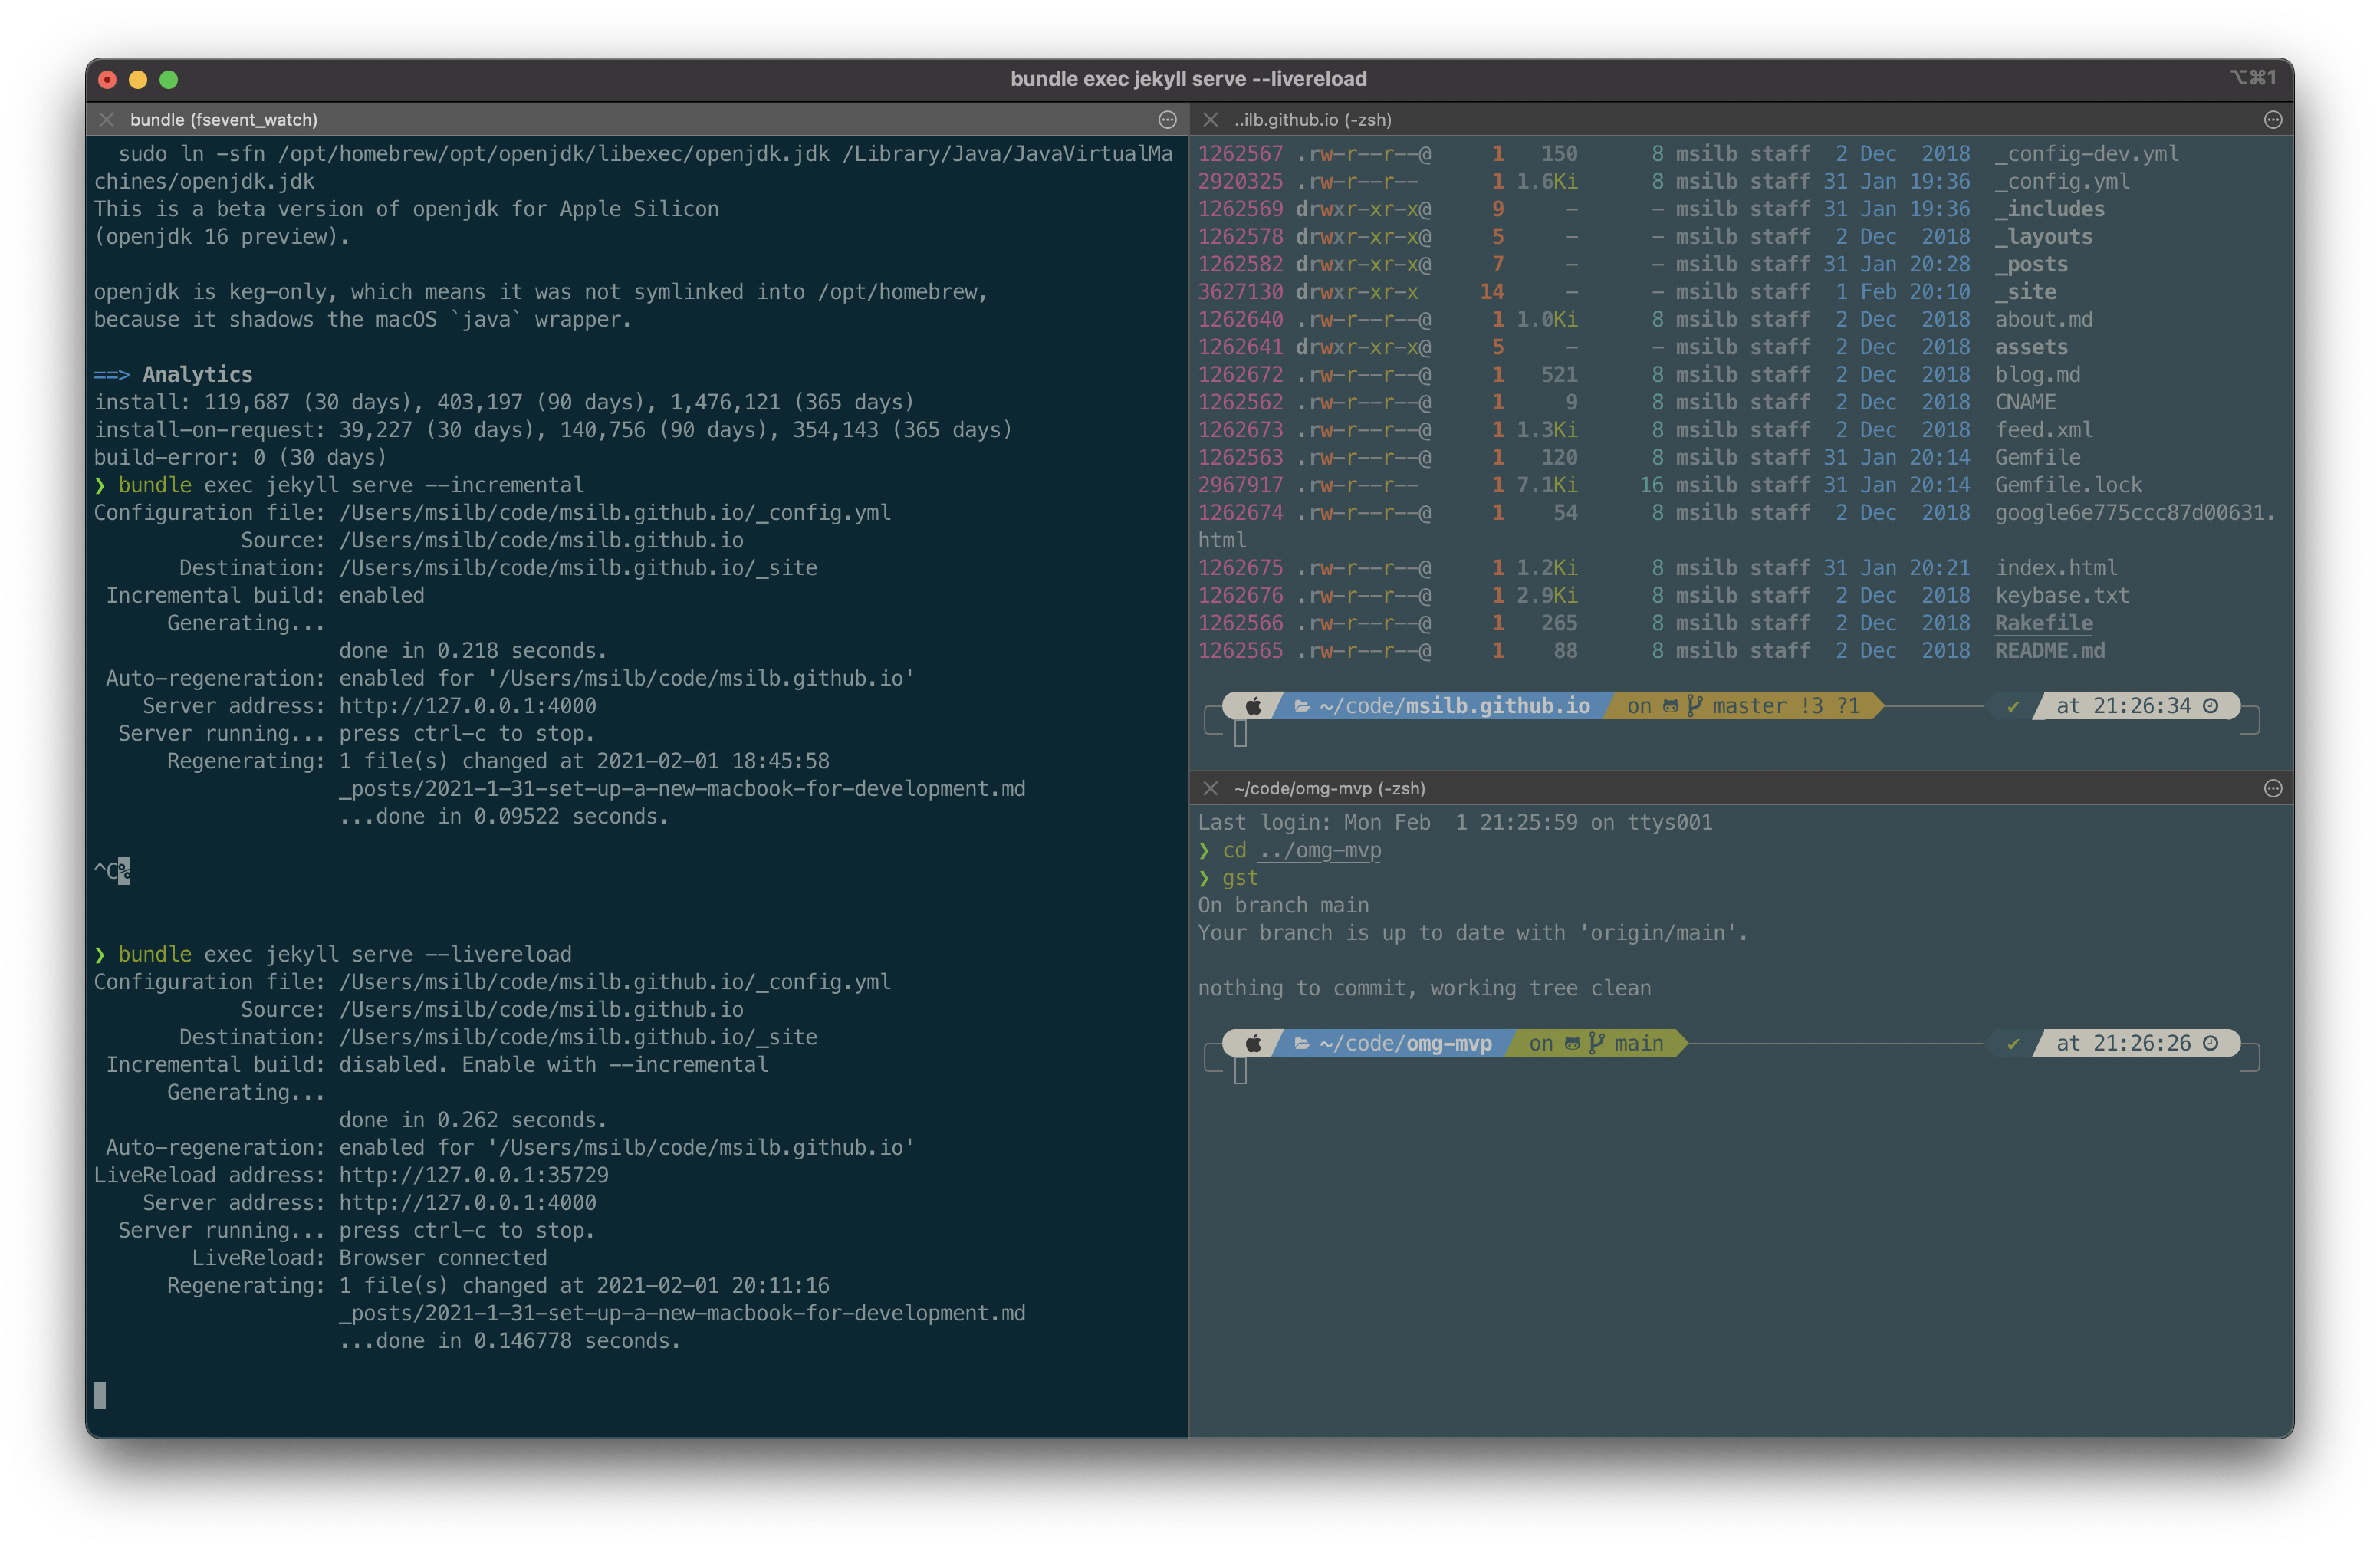
While it is possible to use the standard out-of-the-box Terminal included with macOS, I would highly recommend to install iTerm2 as it offers a lot more options for customization than the default one. After we're done with our setup it would look something like this:
To install iTerm2 simply run
brew install --cask iterm2
Now go open the Preferences with ⌘ + , and select the following:
- General
- Startup tab: Window restoration policy => Use System Window Restoration Setting (you might have to change the macOS setting for this to take effect)
- Closing tab: Untick all checkboxes
- Profiles
- It is recommended to copy the default profile, rename it to your username and set it as default to play around with settings and configure everything to your liking. Click
⌘ + =to duplicate the Default profile and then set it as default from the 'Other Actions...' menu. - General tab: Set Working Directory to 'Reuse previous session's directory'
- Colors tab: Click on 'Color Presets...', click 'Import' and select previously downloaded
Solarized Dark - Patched - Text tab: Pick, download and install your favorite Nerd font to use in your terminal. Those fonts include special glyphs that will make your Terminal a real Pro look once we install
Powerlevel10k.
- It is recommended to copy the default profile, rename it to your username and set it as default to play around with settings and configure everything to your liking. Click
There are a lot more options in iTerm2, too many to cover in this blog post, but this should do it for now.
Oh My Zsh
Starting with macOS Catalina the standard shell is not bash but zsh. One of the best frameworks for working with zsh is Oh My Zsh.
Oh My Zsh is an open source, community-driven framework for managing your zsh configuration.
Sounds boring. Let's try again.
Oh My Zsh will not make you a 10x developer...but you may feel like one.
We're sold! Install it by running
sh -c "$(curl -fsSL https://raw.githubusercontent.com/ohmyzsh/ohmyzsh/master/tools/install.sh)"
Oh My Zsh supports a variety of themes and plugins. All of them (and more) can be configured by editing ~/.zshrc e.g. using vim. Here are the plugins I have installed:
plugins=(alias-finder brew osx common-aliases copydir copyfile encode64 extract jsontools urltools web-search git docker httpie spring colored-man-pages fzf zsh-syntax-highlighting zsh-autosuggestions history-substring-search)
Most plugins add useful hotkeys, commands and aliases to your shell, so feel free to check out their documentation. Pro tip: Use alias-finder plugin to find useful aliases installed by the above plugins:
❯ alias-finder -l git diff
gd='git diff'
gdca='git diff --cached'
gdcw='git diff --cached --word-diff'
gds='git diff --staged'
gdt='git diff-tree --no-commit-id --name-only -r'
gdw='git diff --word-diff'
Note that some plugins are not available in the core repository but rather have their separate repo, e.g. zsh-syntax-highlighting 'lives' here and can be installed with Homebrew.
Plugin zsh-autosuggestions is very useful as it can auto-complete your commands while you enter them by looking up commands from history, then once you're happy with the command, just type → to finish auto-completion and hit Enter:

I won't go into detail of every plugin mentioned above but would recommend you to check out their documentation.
Powerline10k
Powerlevel10k is a theme for Zsh. It emphasizes speed, flexibility and out-of-the-box experience.
This is the last step required to make our Terminal and Shell Prompt look like a Pro:

Well, almost. First we need to install it, as always, we use Homebrew for this task:
brew install romkatv/powerlevel10k/powerlevel10k
echo "source $(brew --prefix)/opt/powerlevel10k/powerlevel10k.zsh-theme" >>~/.zshrc
This will add Powerlevel10k as default theme to your .zshrc config file. Configure it by running
p10k configure
You can select many different graphical aspects of how you'd like your prompt to look like.
After that you're done! Now your new prompt should look something like this:

Other useful CLI tools
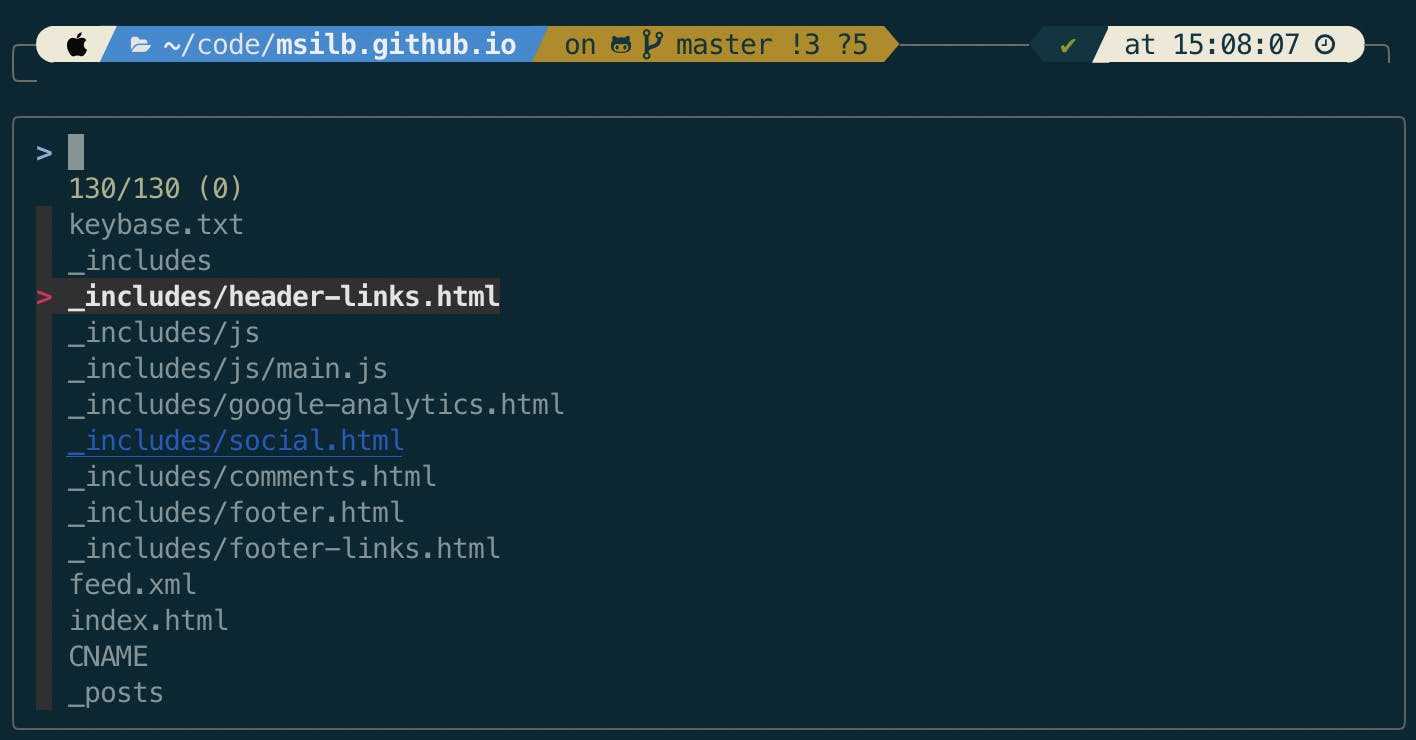
fzf
A command-line fuzzy finder
This tool is absolutely brilliant. It will install 3 shortcuts:
- CTRL-T - Paste the selected files and directories onto the command-line
- CTRL-R - Paste the selected command from history onto the command-line
- ALT-C - cd into the selected directory
Also you need to add some key bindings into your .zshrc for the above to work:
bindkey '^[OA' history-substring-search-up
bindkey '^[OB' history-substring-search-down
bindkey 'ç' fzf-cd-widget
Now you can navigate & search files, history and cd with just a few keystrokes:
It's also super easy to customize the look & feel of the fzf "popup". Just set this environment variable to something you like, e.g.:
export FZF_DEFAULT_OPTS='--height 40% --layout=reverse --border'
For further info on this check out their documentation.
ripgrep
ripgrep (rg)
ripgrep is a line-oriented search tool that recursively searches your current directory for a regex pattern. By default, ripgrep will respect your .gitignore and automatically skip hidden files/directories and binary files.
ripgrep is a modern replacement for grep and can do pretty much everything grep can do, only better and faster. Here is an example of how you would search all Java files in the current directory including all subdirectories, and replace all strings containing the word 'order' (case-insensitive) followed by some letter sequence with a string aaa-$1-bbb where $1 is the aforementioned letter sequence, and finally print the result to stdout:
❯ rg -i 'order(\w+)' -tjava -r 'aaa-$1-bbb' .
./src/main/java/com/omg/model/events/OrderAccepted.java
5:public final record aaa-Accepted-bbb(ClientOrder clientOrder) {

./src/main/java/com/omg/model/entities/ClientOrder.java
3:import com.omg.model.enums.aaa-Type-bbb;
10:public final record ClientOrder(Optional<String> aaa-Id-bbb,
14:                                aaa-Type-bbb aaa-Type-bbb,
16:                                State aaa-State-bbb,
You can also feel the difference in performance compared to grep especially on really big repos/directories.
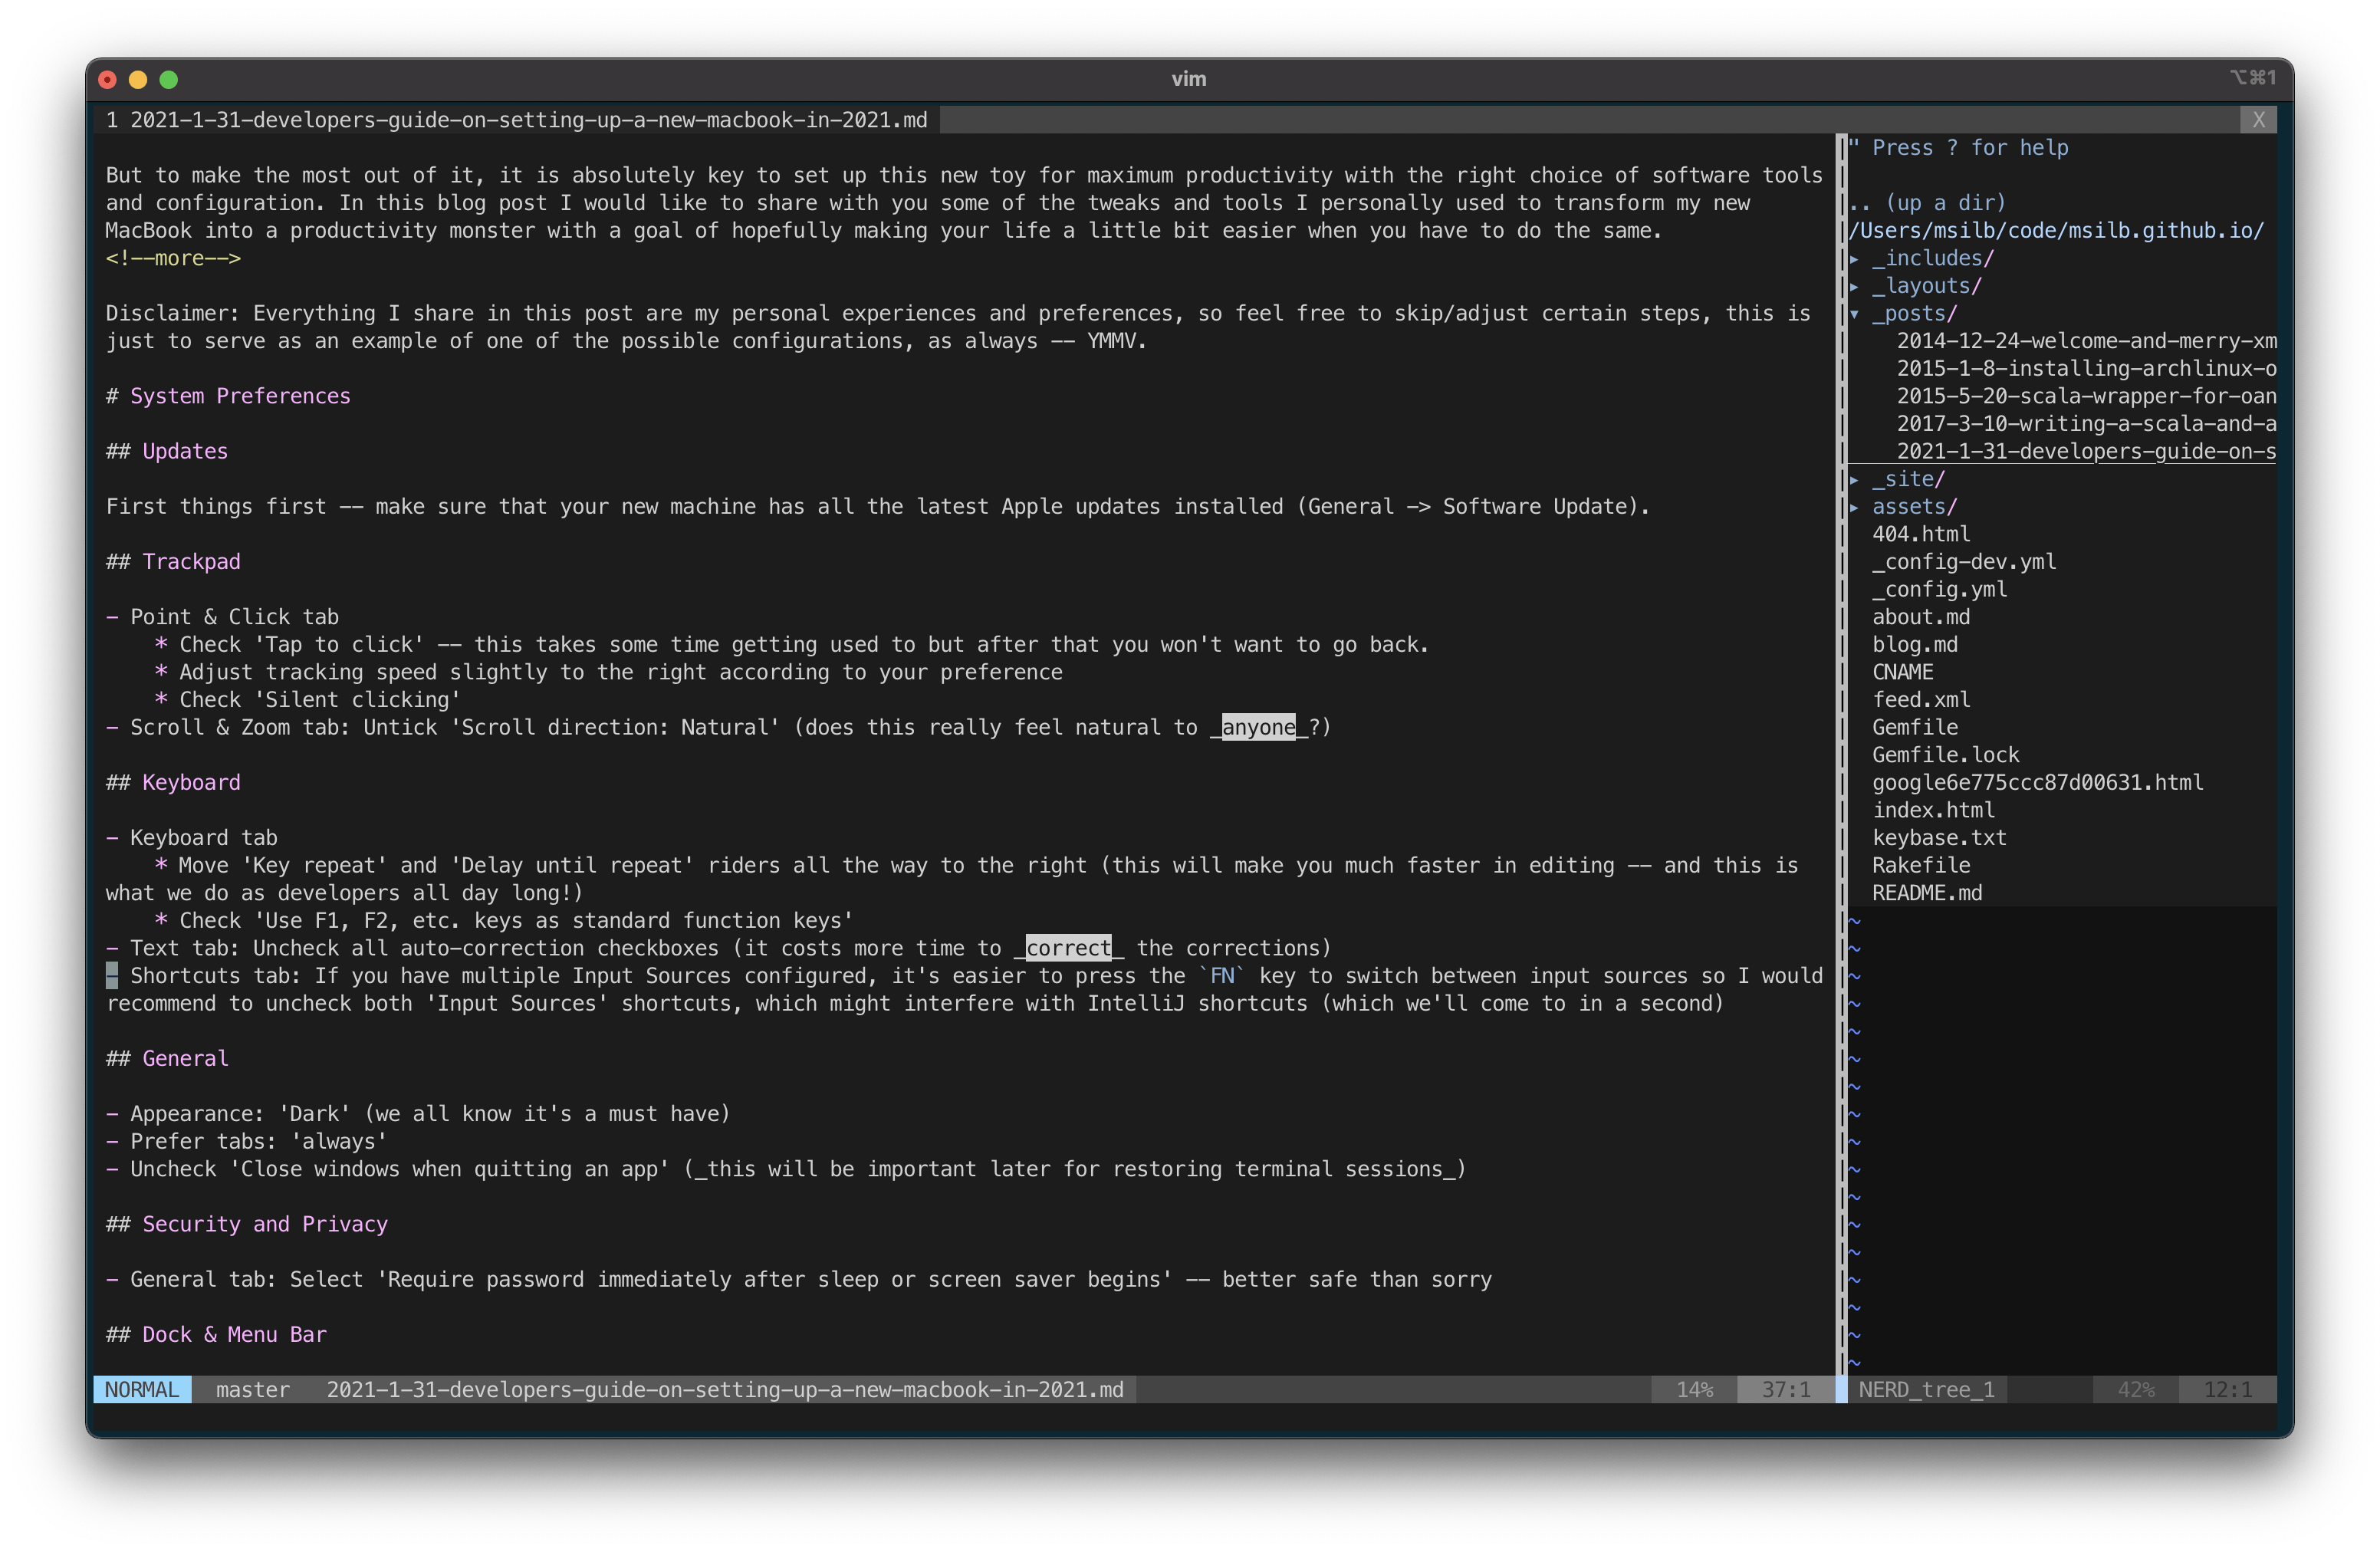
Vim
If you are using vim as your editor of choice, I would recommend to install vimrc, which includes a great selection of plugins and customizations to make your editing work more enjoyable:
Misc
Some other helpful CLI tools I would recommend (all available as Homebrew packages):
- bat: modern replacement for cat with much nicer output
- cloc: count lines of code in many different programming languages
- htop: cross-platform interactive process viewer (just like
toponly better) - tldr: collection of community-maintained help pages for CLI tools that aims to be a simpler, more approachable complement to traditional man pages
- exa: better version of
lswith customizable colored output: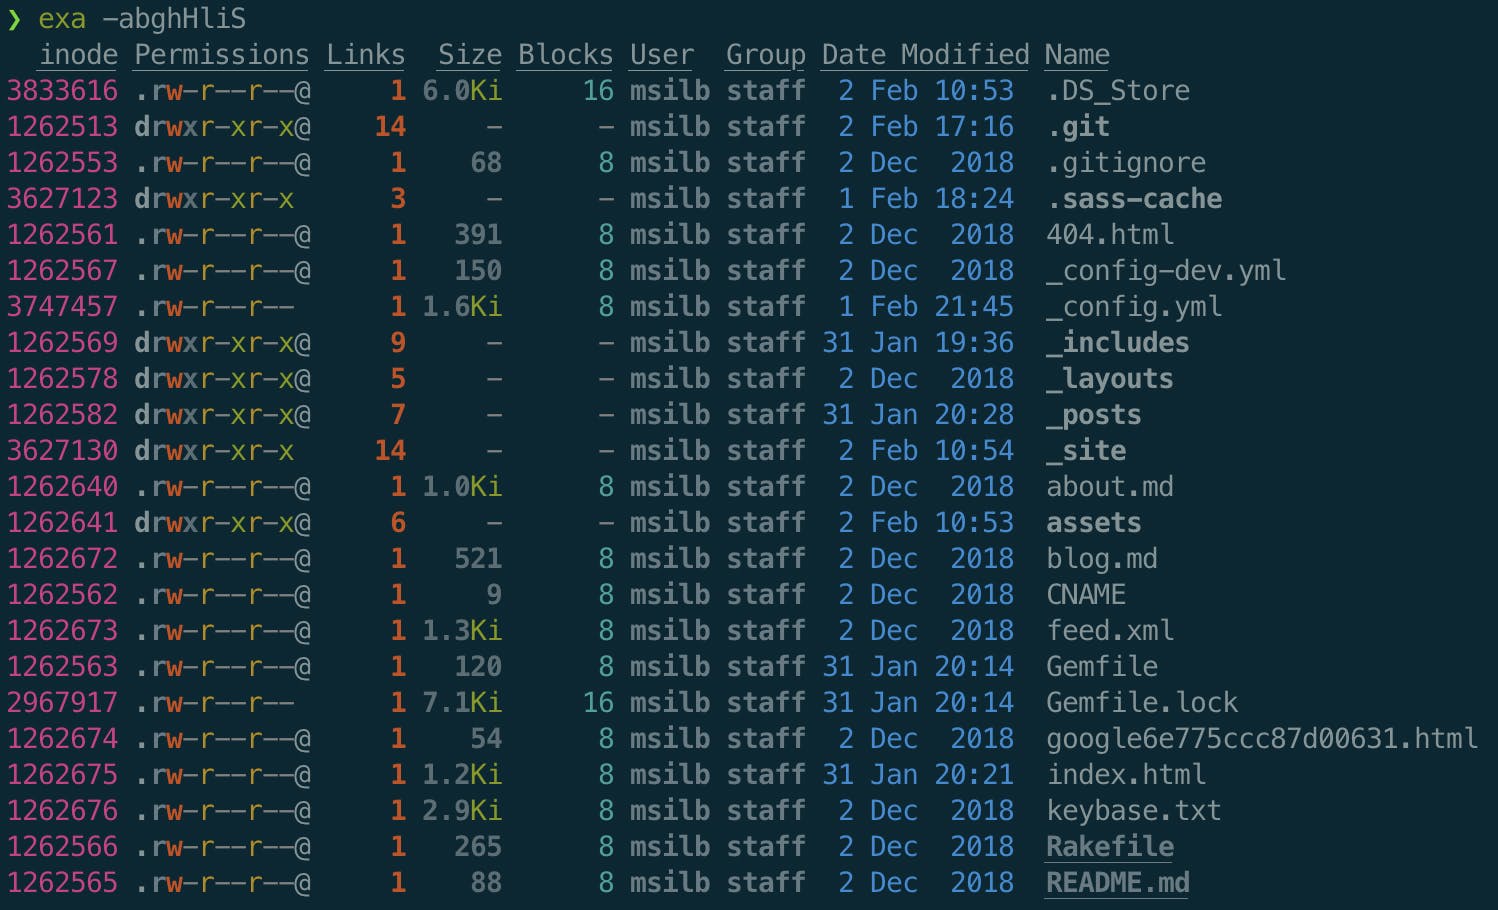
GUI Applications
There are also two GUI applications I can't not mention when we're speaking about productive macOS setup. I would recommend to also install those via Homebrew (just use --cask).
Rectangle
Move and resize windows in macOS using keyboard shortcuts or snap areas
This is a super useful tool that allows you to arrange windows on your Mac in an efficient way. Maximize window with ⌃ + ⌥ + ↩ or move it to the left, right, upper or lower half of the screen with ⌃ + ⌥ + ←, ⌃ + ⌥ + →, ⌃ + ⌥ + ↑, and ⌃ + ⌥ + ↓, respectively.
CheatSheet
Just hold the ⌘-Key a bit longer to get a list of all active short cuts of the current application. It's as simple as that.
Nothing more to add to this description.
Summary
Ok, I hope you enjoyed this tutorial on setting up your MacBook for maximum productivity as a developer. Appreciate your feedback in the comments below and if you feel there is something missing, please let me know!